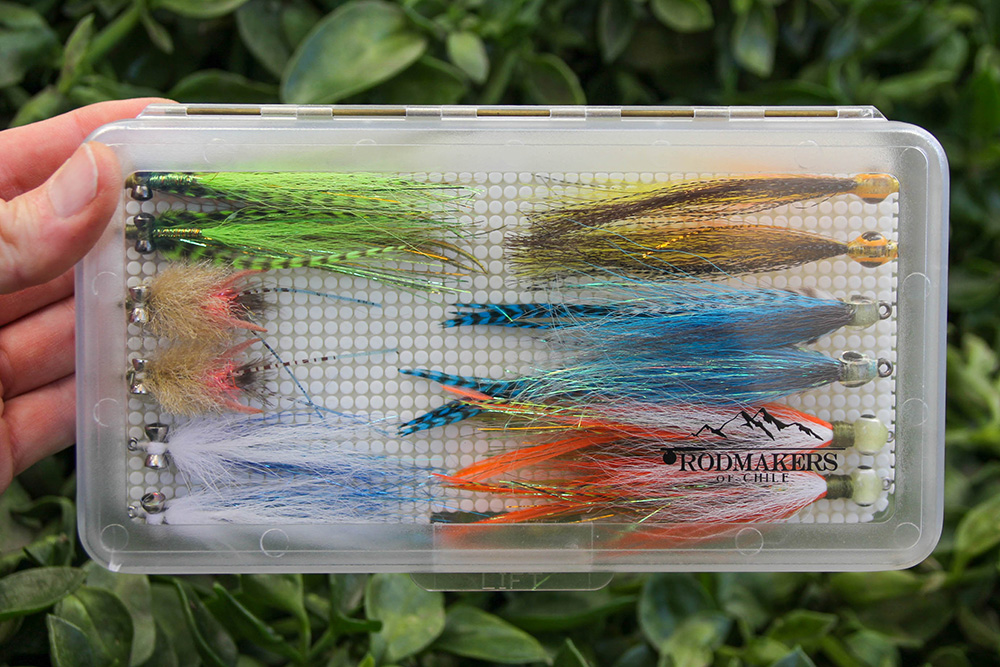
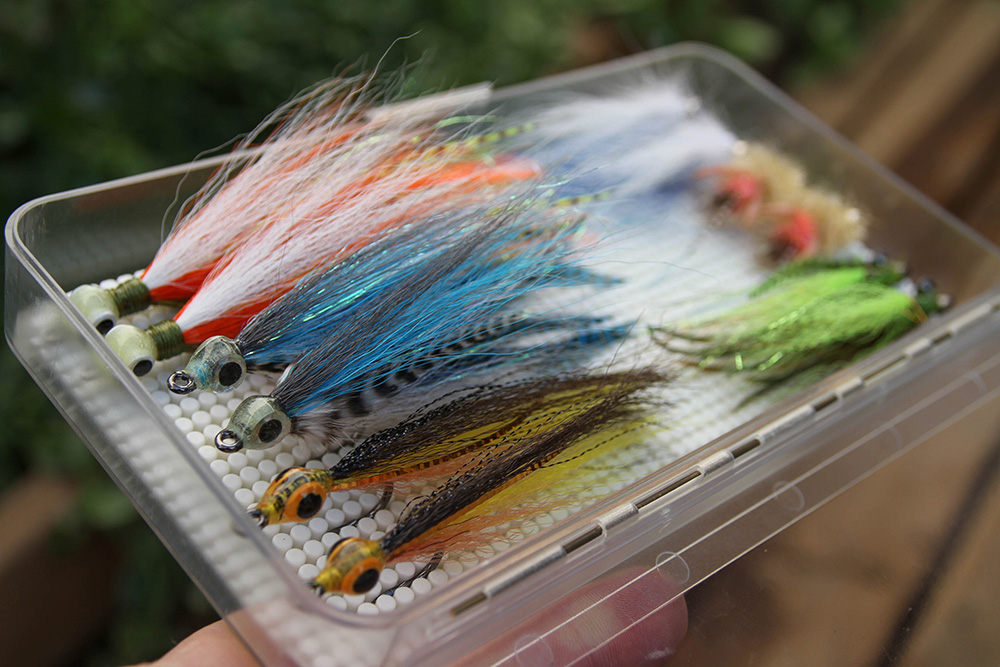
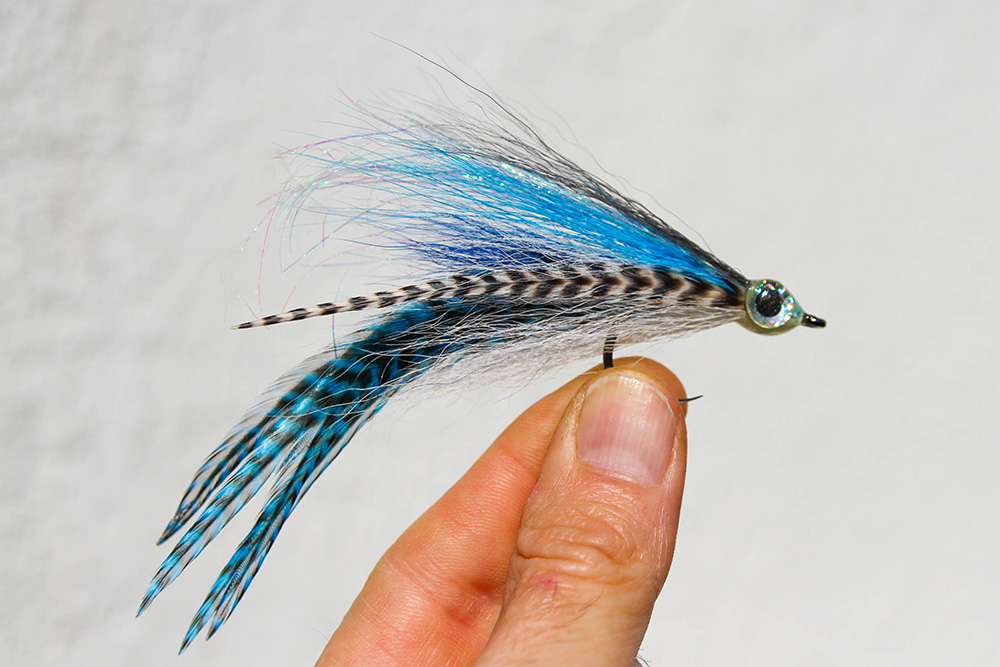
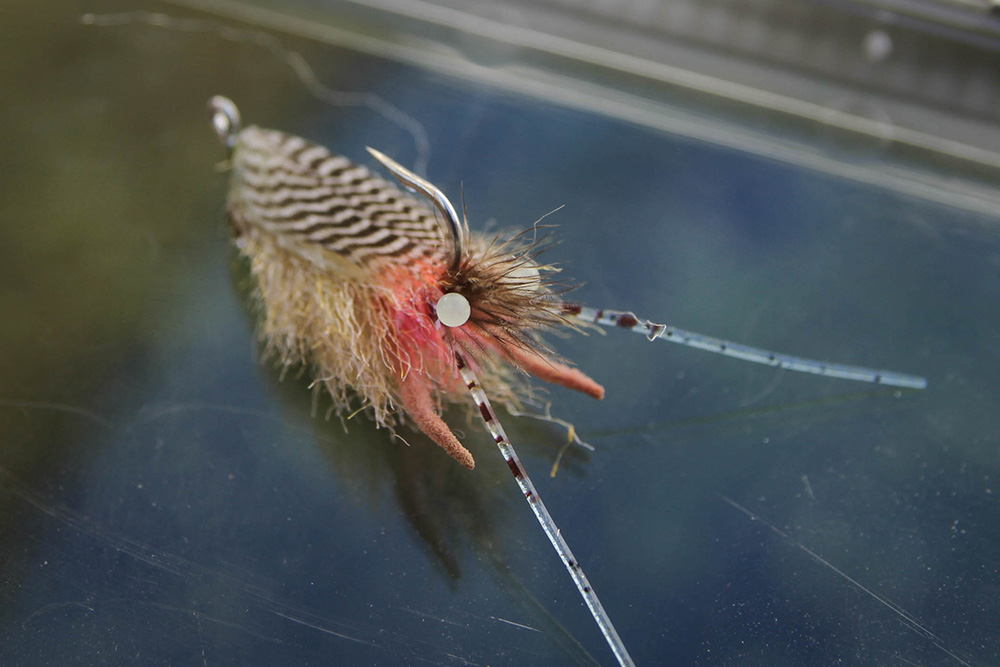
Saltwater flies for Chilean Coast
For a limited time we are offering our custom flies with popular themes. This first theme is Saltwater Flies for fly fishing in Chile. $64.000 Chilean pesos gets you this box with two of each of 6 patterns- 12 flies total. ($49.00 for flies only)
The Fly box – Our nubby tack boxes accommodate smaller hooks better but they WILL hold these saltwater hooks and provide lots of space inside for these flies and maybe a few more if needed (Large clear box, $15.000).
There are great opportunities here in Chile to fly fish from shore or from a boat with good success. Corvina, Lenguado, Robalo, Sierra and Tuna are popular species. This collection of flies is specifically tied for any scenario on the coast of Chile and is all you need to challenge these feisty fish. Note: toothy fish like Sierra will require a wire leader.
Why Choose Fiberglass?
We love modern fiberglass fly rods so much that we are making it our mission to share the experience with more people!
Here are the highlight characteristics of the modern fiberglass fly rod:
1. Tippet Protection on the set or during the fight.
2. You can feel the rod load/literally casts itself
3. Leverage, especially on the heavy line weights and on big fish
4. Durability of the material compared to graphite
5. Great for learning how to cast
6. FUN to cast and fight fish on as rod bends well
7. Loads well for short distances casts which fast graphite cant do
8. Aesthetically Classic and colorful


Rod Care, Part 1
Assembling & Usage
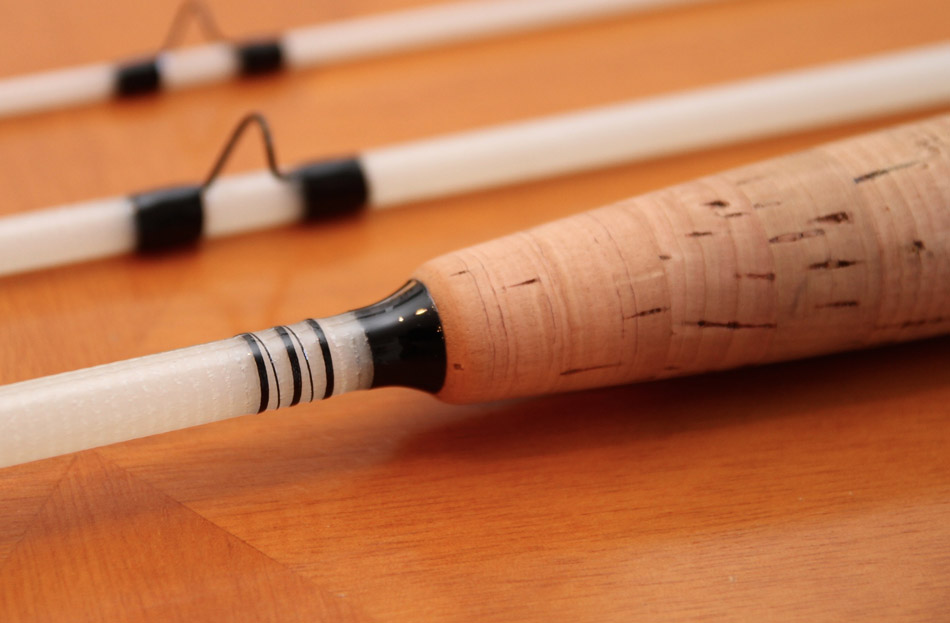
Your fly rod is likely a 4 piece rod which means you have to put the sections together to use it and take them apart to store or transport it. Not all rods have alignment dots but if yours does then this will save you some time when putting it together.
Connecting the sections seems easy enough, building the rod from the biggest section to the smallest by inserting the male ferrule into the female ferrule, but lets do each connection in two steps. First, fit the sections together loosely (or just snug enough to hold) with a half clockwise turn as if the ferrules were threaded and you were “screwing” them together. Over time this creates a spiral texture on both ferrule surfaces that will not allow the rod to slip straight off during use. Do this to the point where the dots line up or where you have determined that the guides are in line. Second, sung the sections together straight (dots still aligned) with a medium amount of force. you may see and hear the slight click of the sections cinching together more tightly. Now you’re ready to use it.
Removing sections can be a dangerous procedure. Use these techniques in this sequence to avoid permanent damage to your rod ferrules. If the first method does not work then go to the next.
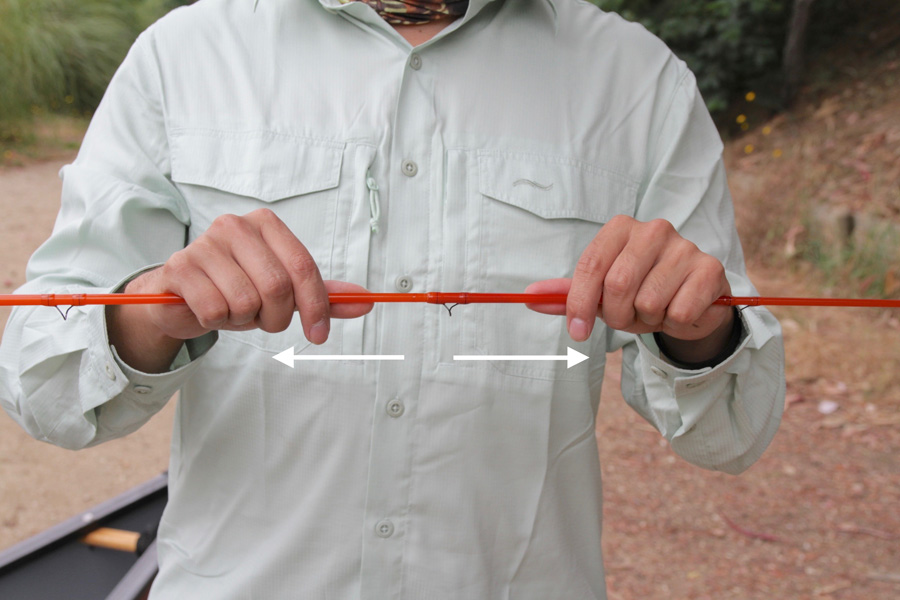
1. With dry non-greasy hands pull the sections apart by holding the bare rod (not holding any guides for leverage) somewhat near the ferrules and pull apart as straight as possible.
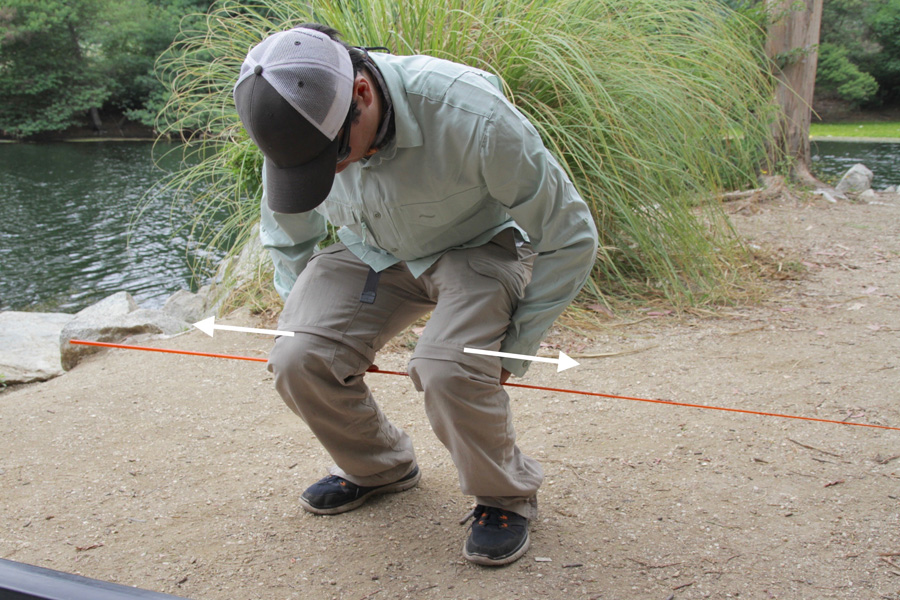
2. Again, with dry non-greasy hands, In a bent-over position put the rod behind your knees holding the two sections by the bare rod with arms outside your knees. Then push your forearms apart with your legs. This gives more force and ensures the sections are separating straight.
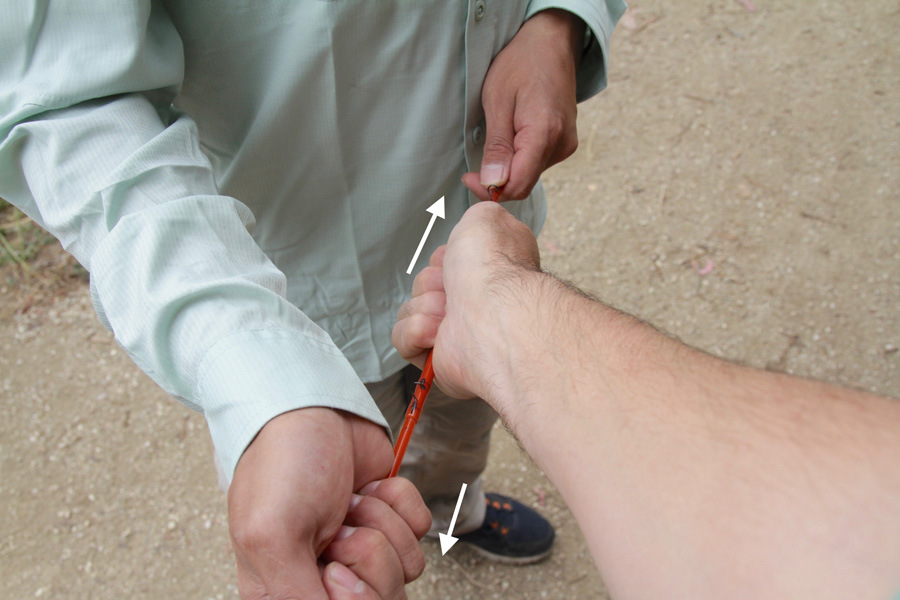
3. This technique requires the assistance of another person. Face the other person with rod between you. Each person holds the rod under their open elbow and toward the other person. Each has a hand on the each sections so you can count the four hands on the rod (theirs, mine, theirs, and mine) and on your mark you both pull the sections straight apart.
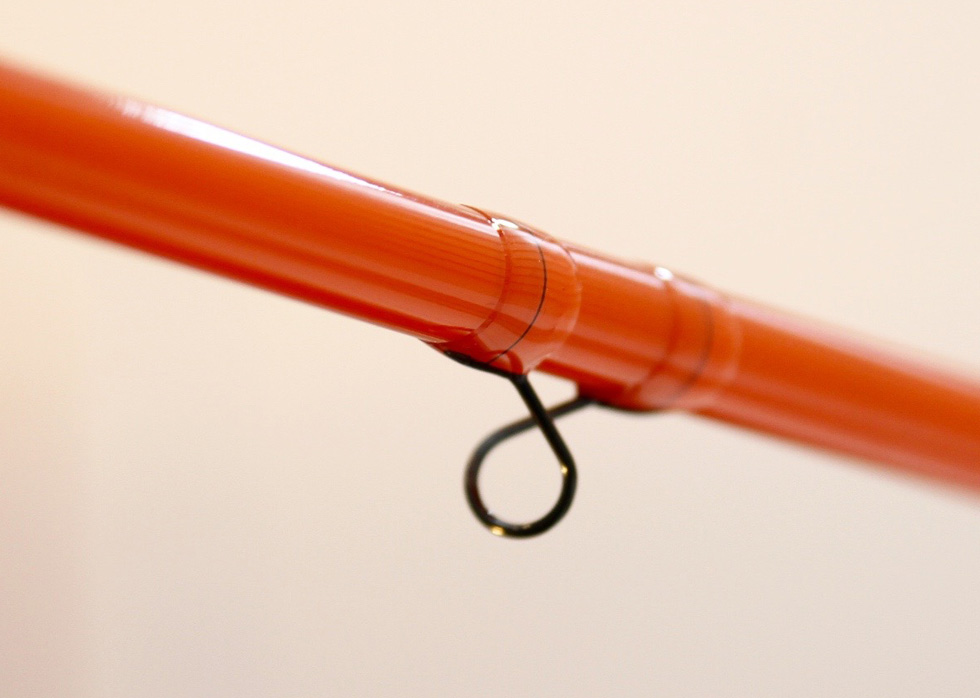
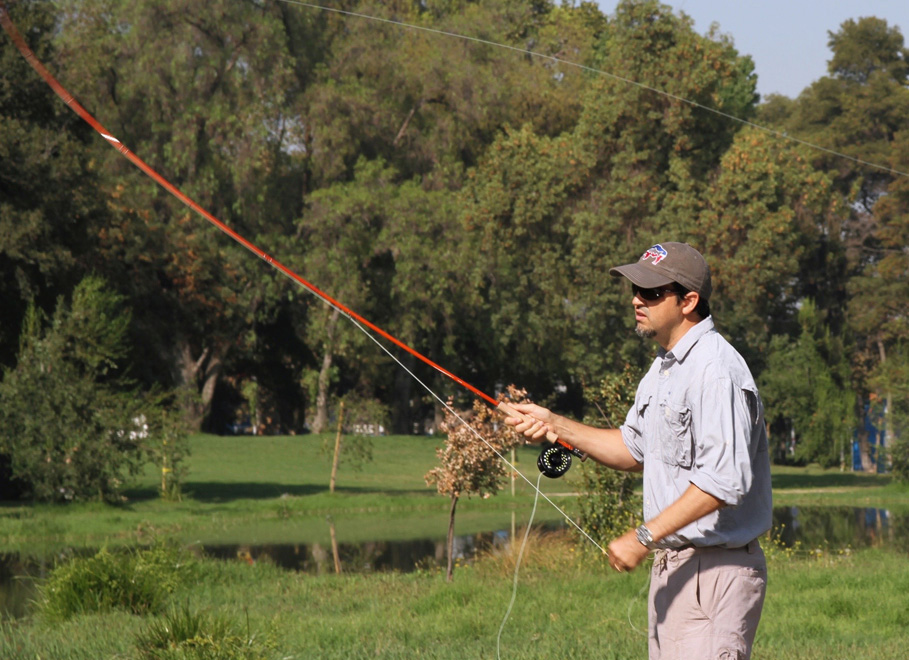
During use of the rod keep in mind that the tip is the most fragile section. The fly rod is primarily a casting and fish fighting tool, and secondarily a hook-setting tool. “Trout” or small fish hook sets with the rod should not be forceful ful but performed with light to medium force and with swift controlled speed. Don’t set like a bass fishing professional. With larger fish and actively retrieved flies the hook set should be more of a strip set of the line while the rod angle remains (mostly) low. Besides protecting your rod from a shock break this also is a good hook set technique where if you miss the fish the fly has not gone far out of its strike zone and it may eat the fly again.
The rod angle can be high (pointed straight up) with light or medium line tension but if greater force is required to fight, turn, or lift (never in the air) a fish then the rod angle should be much lower.
High rod angle with light pressure.

Low rod angle with heavy pressure
Strikes to the graphite are never a good thing. If your rod doesn’t appear damaged from a strike then it may be weekend only to fail later. Strikes can occur from contact with a weighted flies traveling in the air very fast or by inadvertently hitting your rod on a solid object while casting. Be very aware of your surroundings for this reason and also because rods conduct electricity very well. Don’t be casting outdoors during a storm.
Breaks by stepping on the rod or having a big fish double it over when it makes an unexpected land run when you’re trying to unhook it are some other common and real dangers. This is why even in the most intense and exciting moments in fishing it is important to consider where you are leaning or laying down your precious rod. We’ll cover rod transportation dangers in the next post which will include the mistake of walking with your tip pointing forward, especially when going down hill.
Snags, or the art of getting your fly stuck in a tree or submerged object definitely delays fishing. Don’t be tempted to use your rod tip to remove the snag. Naturally, a little tugging and shaking can remedy a simple snag but flies do tend to wrap themselves around limbs and hook into vegetation firmly. Do you know the roll cast snag-removal technique? If you can reach the snag then set your rod down in a safe position and remove it by hand. if not then you may have to sacrifice the fly- still better than a broken tip! Just point the rod at the snag, hold the reel from turning, and pull to dislodge the fly or break the tippet (line).
Who Is This Rod Maker?
Hello friends and visitors! We decided to use a blog post to tell you more about myself and what I do behind the scenes here at Rodmakers of Chile. I’m Michael Munoz, but pleas call me “Mike”. I’m our shop’s chief rod builder, marketer, photographer, and general custodian.
I’m here in this beautiful country primarily because of the little family my Chilean wife and I started. We wish for our children to be raised traditionally, bilingual, and as close to reality as possible. I’m also here because I saw an opportunity to bring unique and beautifully crafted fishing rods to the anglers that live here and to those who visit. Here’s my back story.
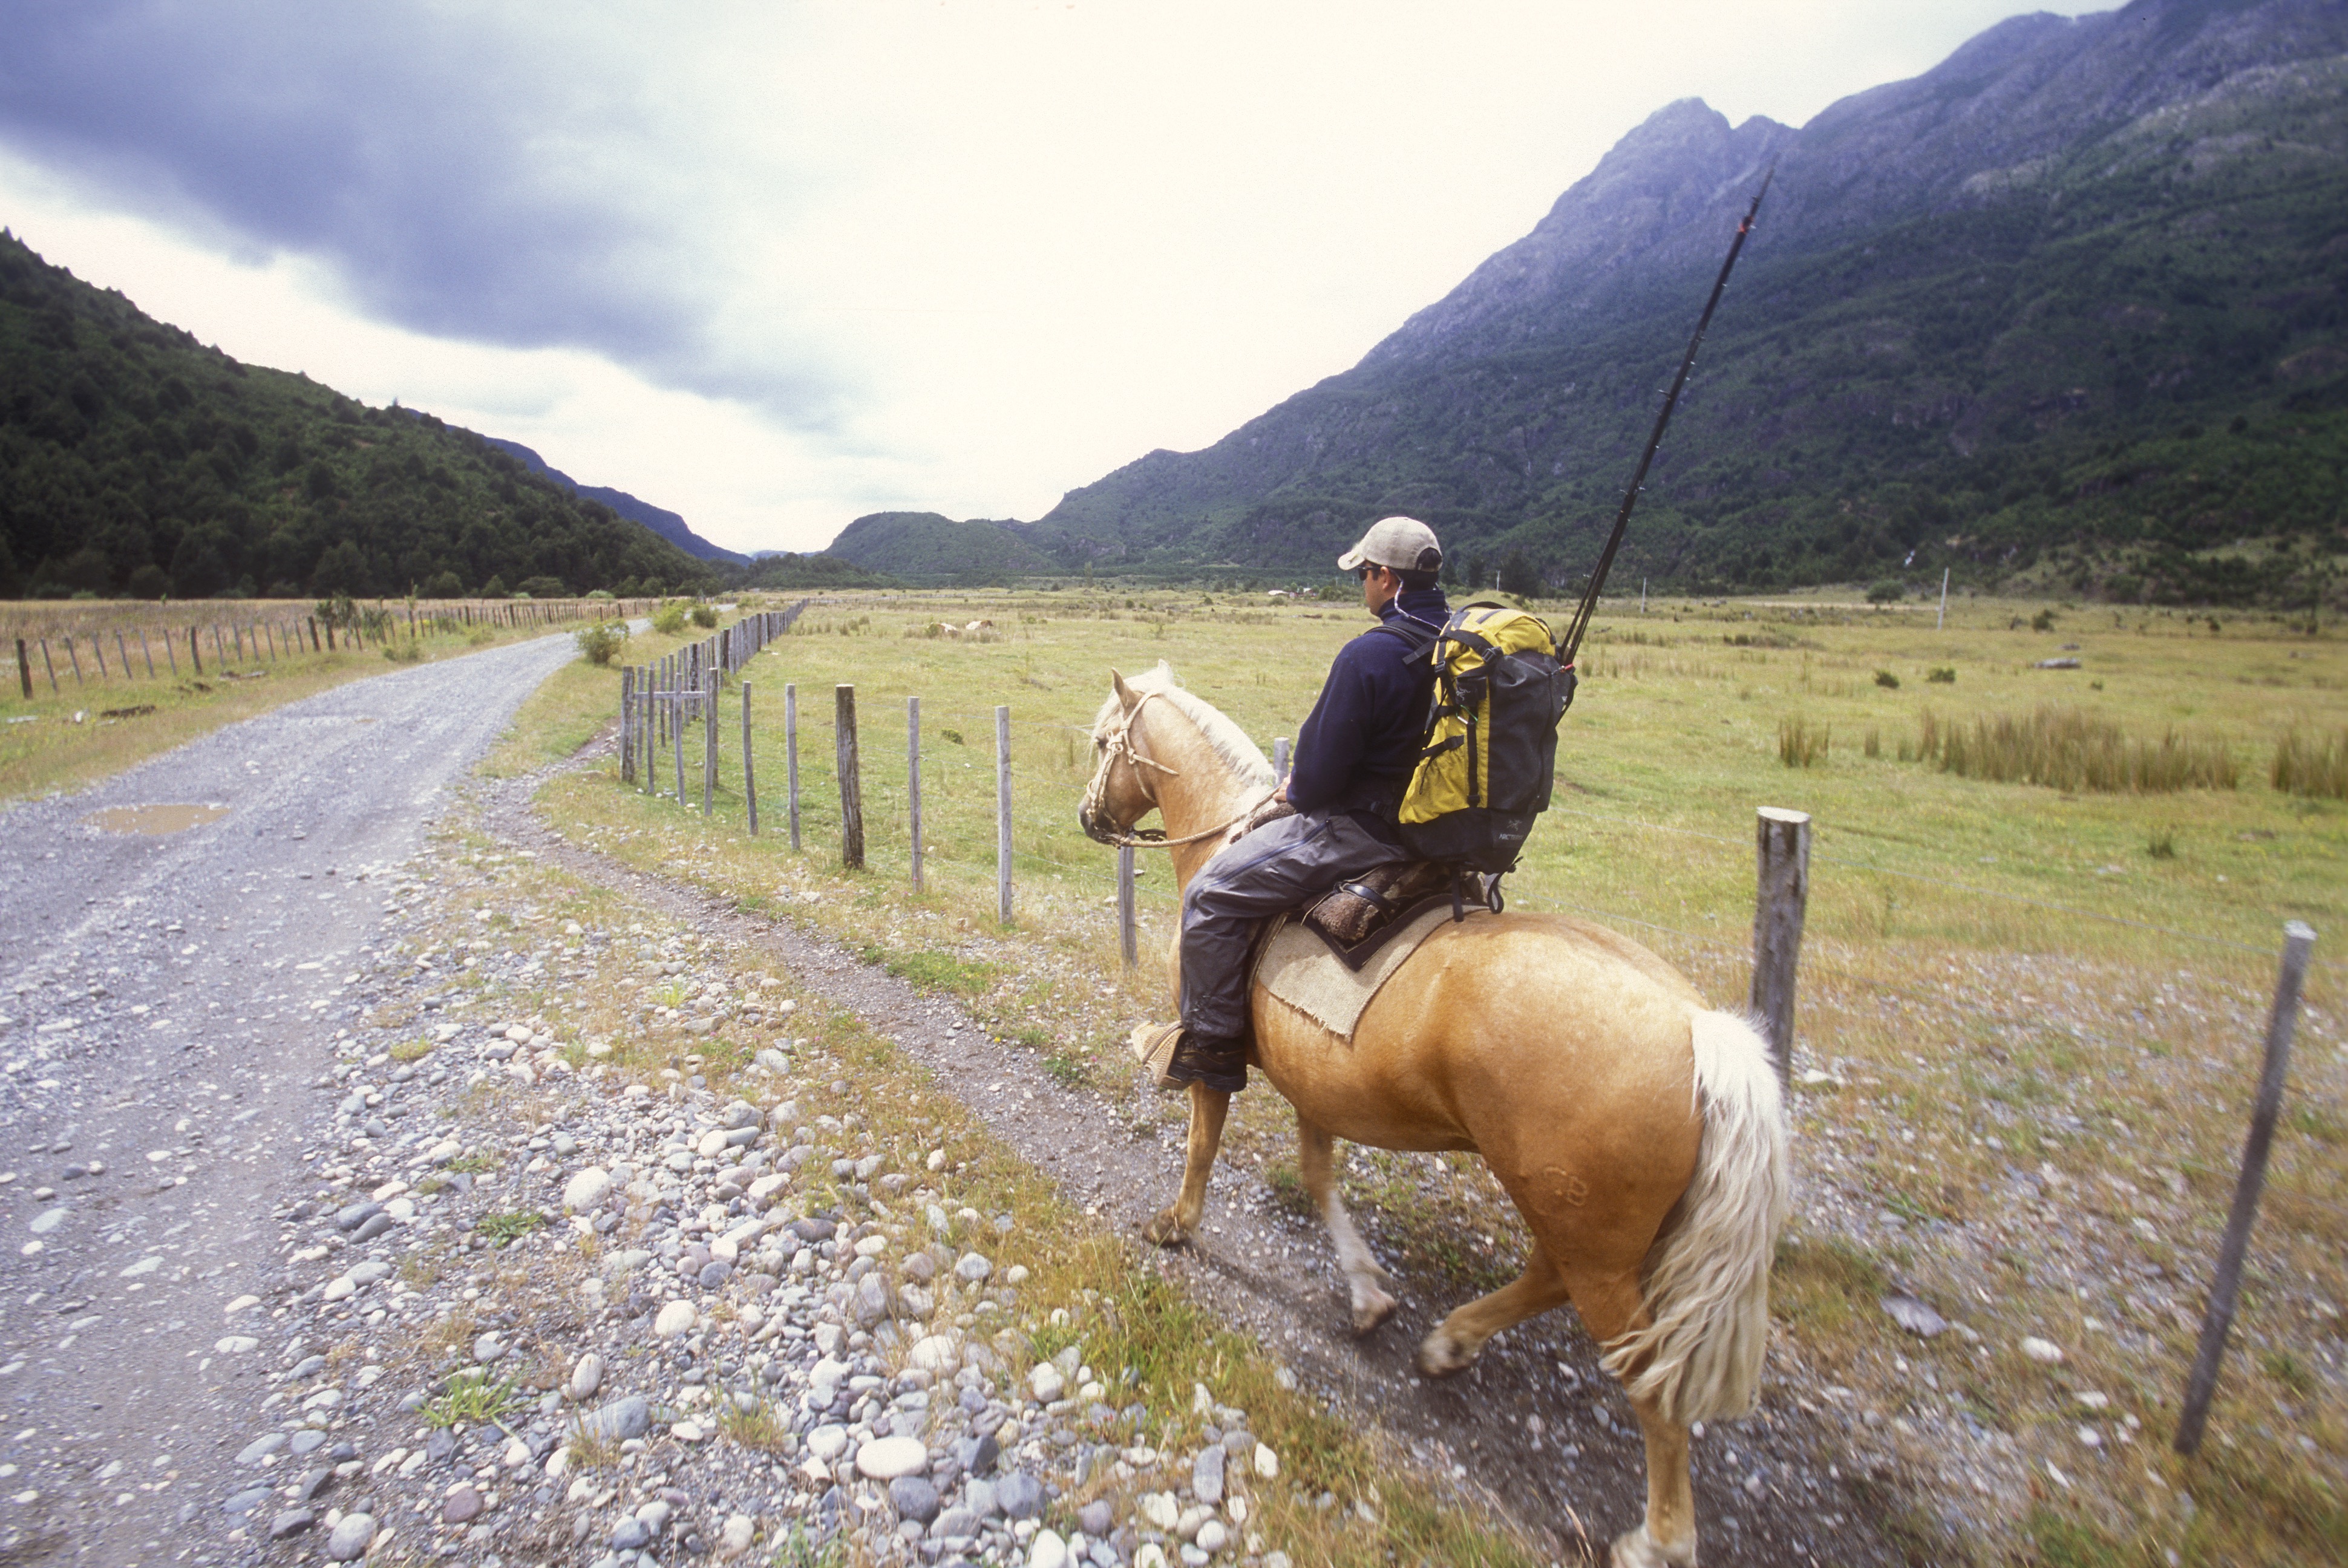
My first desire to build fishing rods was in my junior high school years when my family lived in Illinois, but without the parental support or financial means to get started I had to wait. Babe Winkleman’s Good Fishing and Al Linder’s In-Fisherman television series (Circa 1985) fueled my growing passion into dreams that drove me to pursue angling (and guiding) adventures in Alaska, Patagonia, the Texas Hill Country, and the Florida Everglades.
In 1998 I was given an opportunity to work at a fly fishing/rod building shop in San Antonio, Texas- One Shot Outdoors. Besides offering built custom rods this shop invited customers to build their own rods under the schooling of Dennis Freeman. In the short three-year life span of this unique shop Dennis and I taught rod building to over 100 anglers and built an unknown number of fly, spin, surf, and spey rods.
After the shop closed its doors I continued to build rods for customers under the Munozafa.com banner, my own brand. Still in the shadow and territory of my mentor Dennis, I kept my operation at a small side-business level. My work was eventually recognized by the infamous angler Joe Robinson and the outdoor writer (of Texas Parks & Wildlife magazine) Gibbs Milliken. Both Joe and Gibbs gave me high marks in their publications Piscatorial Absurdities and the Texas Parks & Wildlife 2007 Gift Guide. Unfortunately, Gibbs passed away shortly after our first collaboration.
With the move from Texas to Chile in 2011, and then a two year stint in Florida, my rod building activities were put on hold for nearly four years. Ironically, my good friend Ben Casarez (now of Flat Creek Rods) who I had helped get started in rod building had become a great resource for my re-entery into the craft. I immediately found that I had to take my abilities to another level and embrace the fact that I would constantly have to evolve my skills and adapt to my target market.
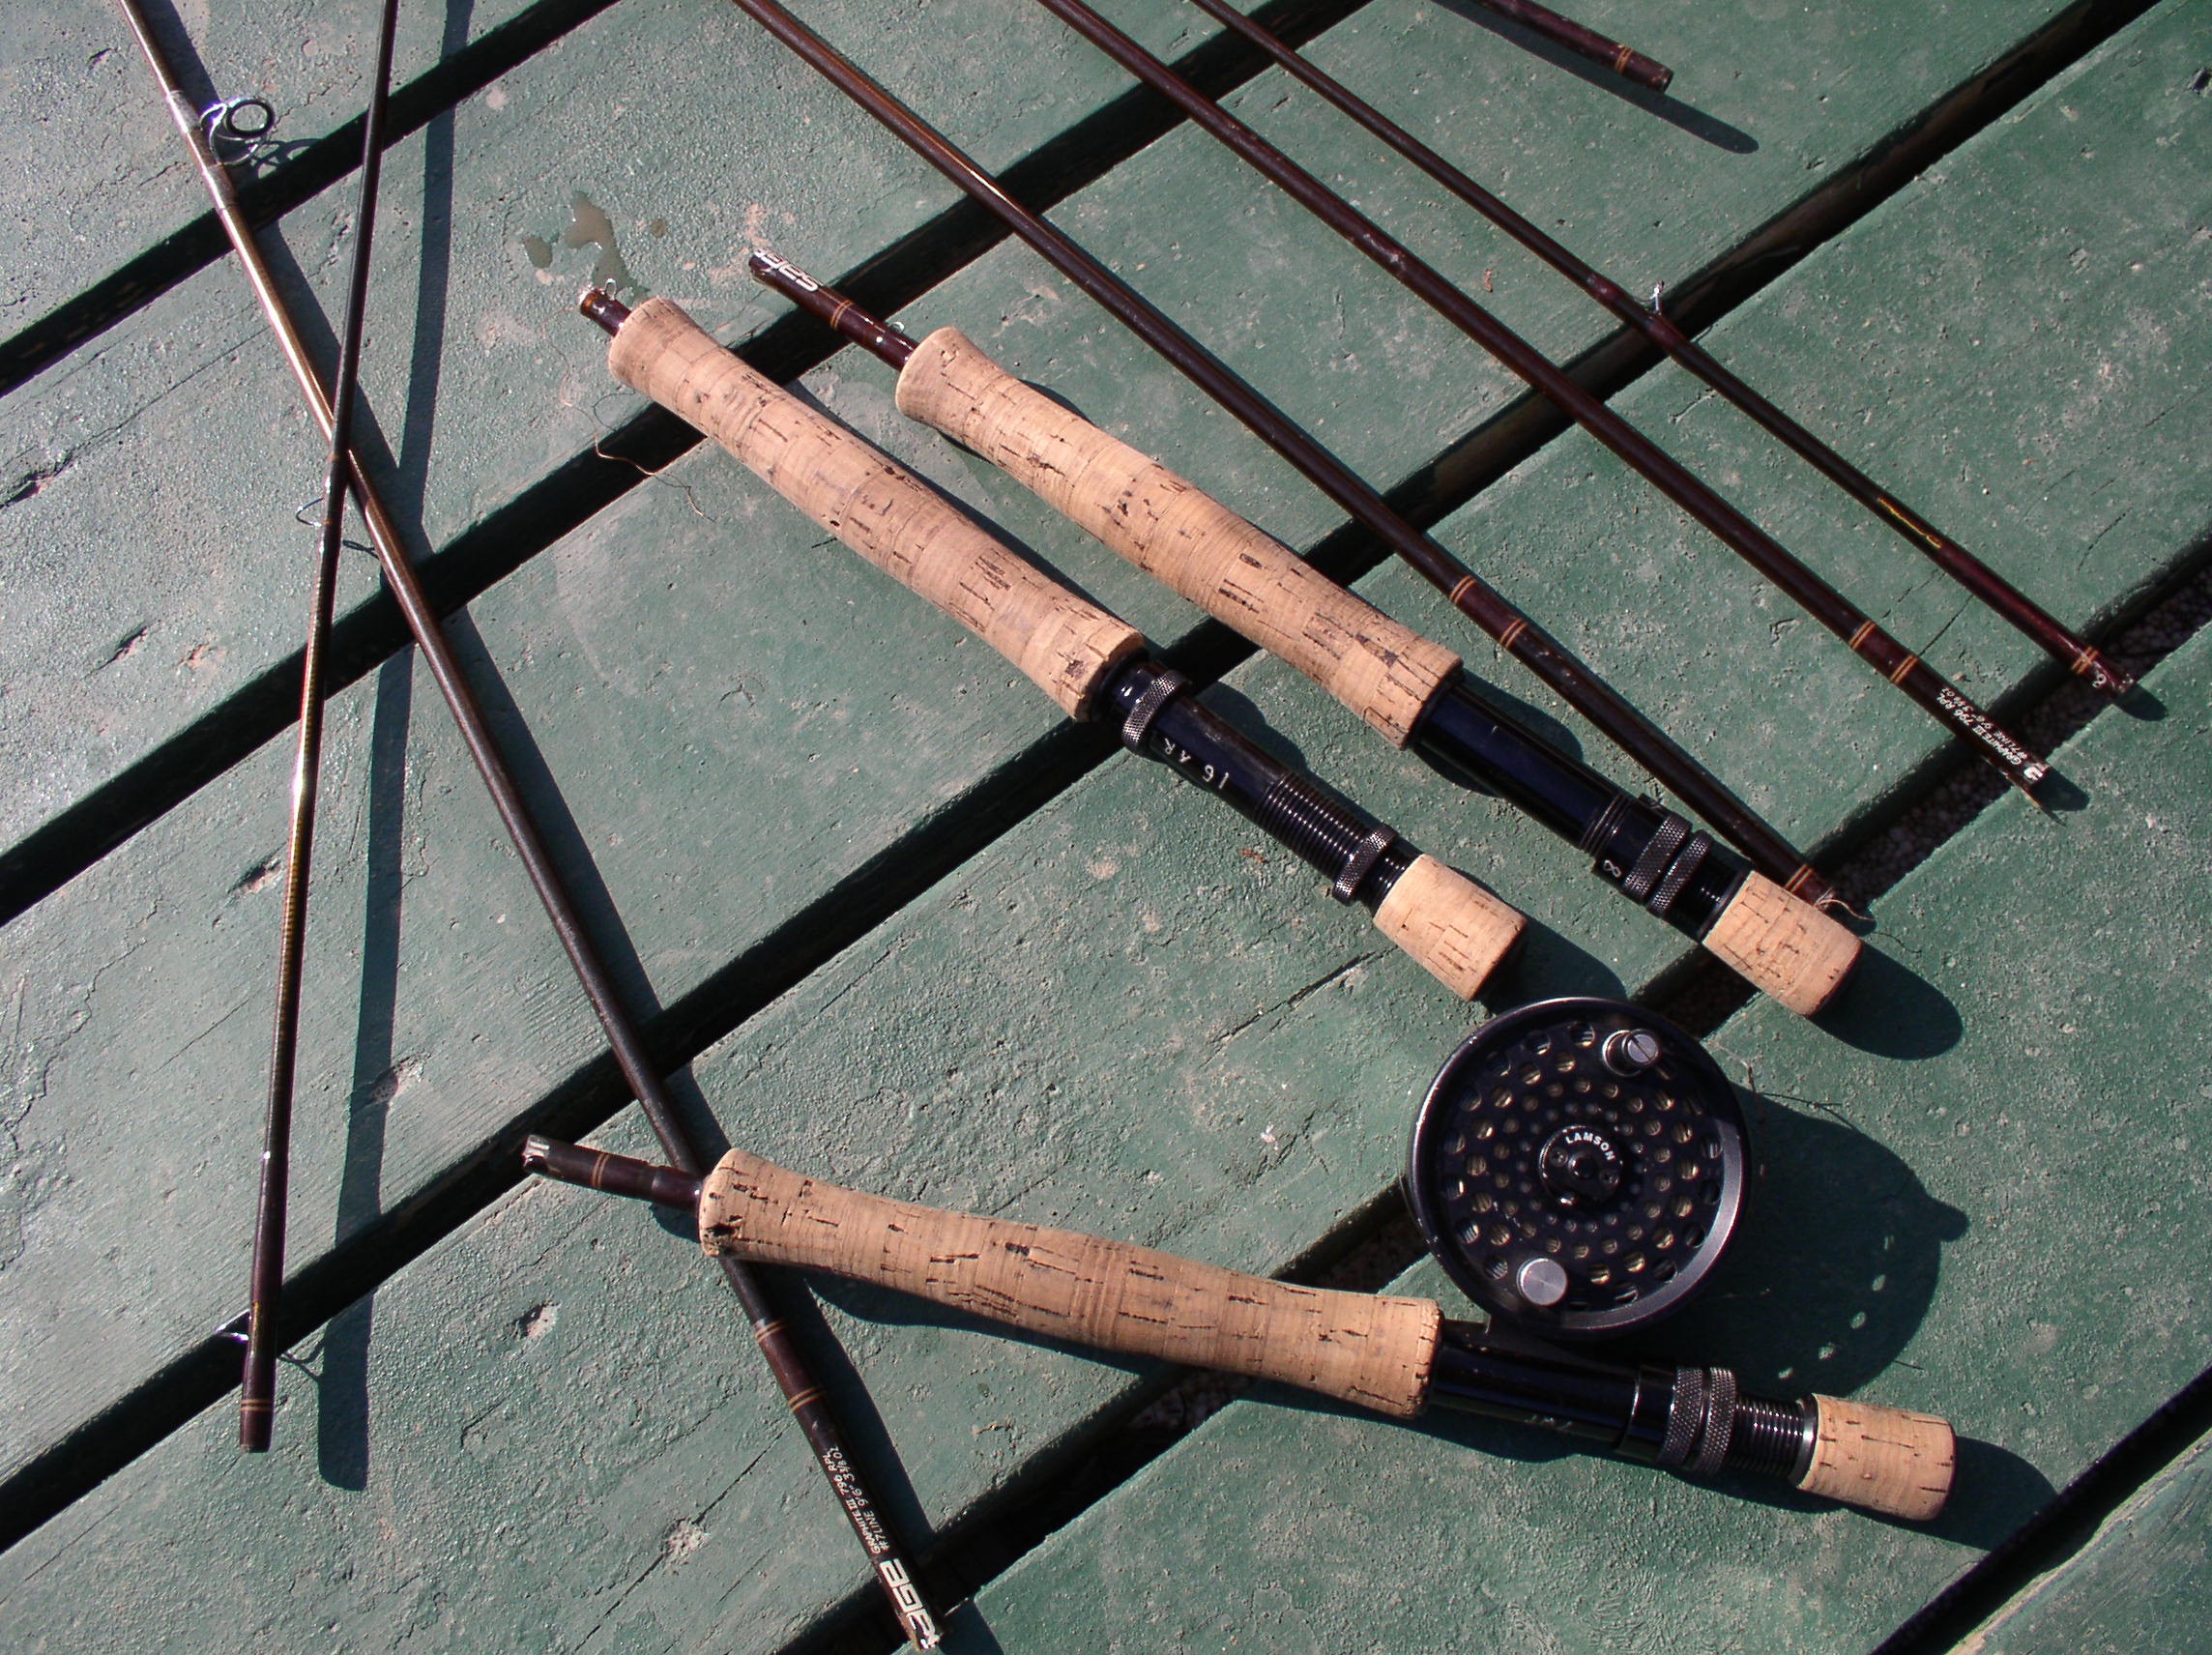
Some of the rod building techniques and materials that we’ve adopted since the days of building rods along side Dennis are, incorporating EVA foam into our cork handles, using varnish for thread coats, turning our own (native) wood and acrylic reel seat inserts, using white and black ink for inscriptions, using Fuji brand nylon and gossamer silk thread, branding our own graphite blanks (Andes), and one or two other trade secrets that I should probably keep quiet.
Some older techniques that we still enjoy using are the epoxy winding check, the cut and sanded rubber butts, the thumb groove in the cork handle, using a variety of cork types in handle designs like checker inlays.
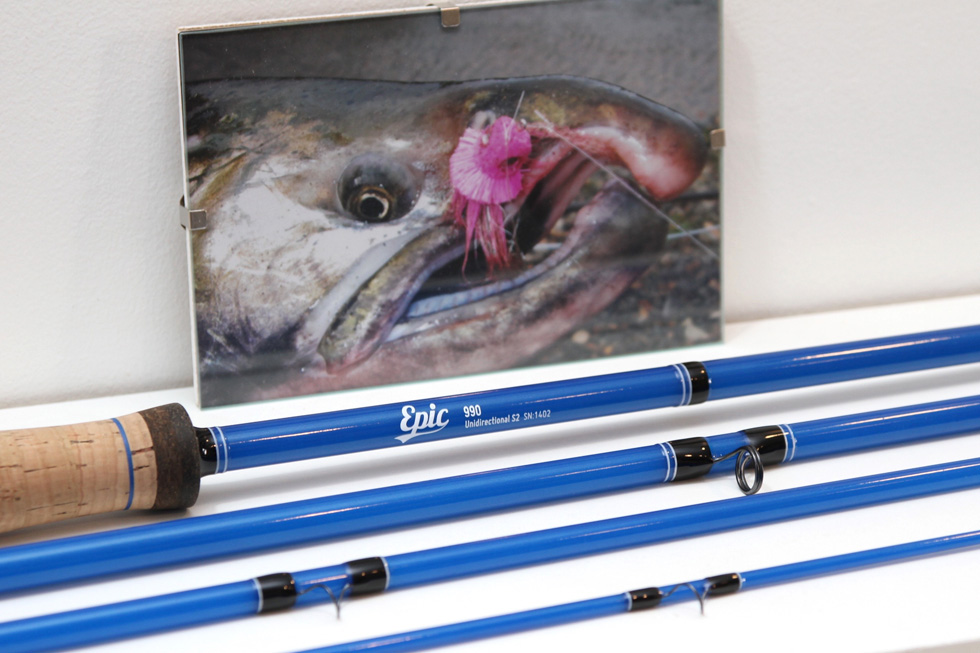
Today were busy building new rods with the brands that we’ve carefully selected (R.L. Winston, TFO, Andes, Seele, Sunset, and Epic) We make these rods extra special and personalized for our customers. this means the very best workmanship (we take our time), materials that rod companies don’t offer (like native wood and acrylic in reel seats), very personalized (your colors, your designs, your name, and to fit your hand), and a relationship with the person who made your rod (me and my promise to you).
Thank you for reading. Please drop us a line. We hope to hear from you wherever you are in the world, and we wish you happiness in the places that you find peace and fish!
Michael
Feeding topwater flies to redfish in shallow water with Kenny Smith
Casting the Epic Fastglass 686 for the first time. excellent rod!
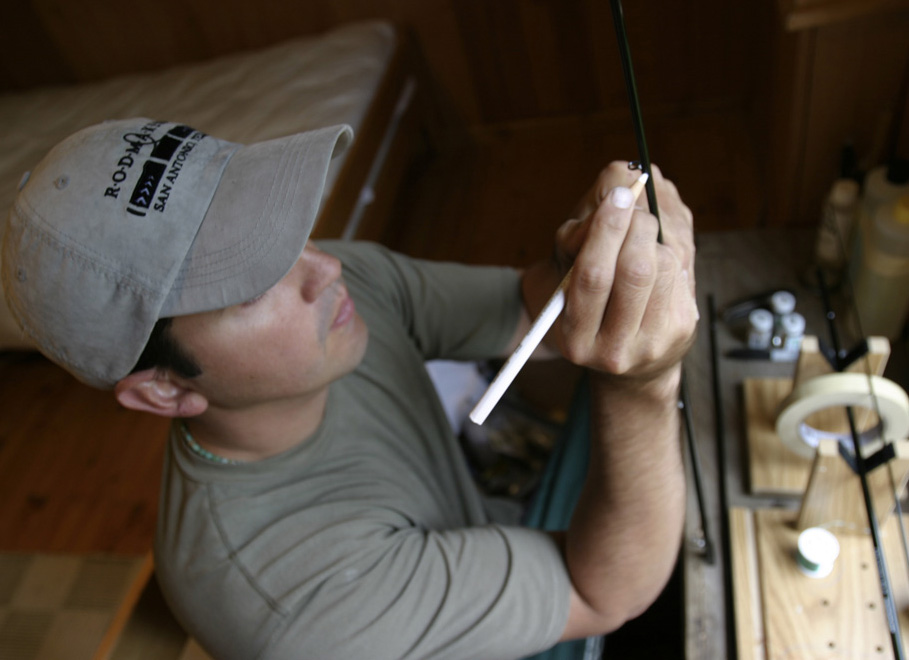
Building a custom Sage fly rod at Rio Palena Lodge in 2005, Patagonia-Chile
Happy New year 2016!
Happy New year! We hope you and your loved ones had a happy and memorable 2015 and are ready for a prosperous 2016.
After our visit to North America for the holidays we’re back in the shop to complete the rod projects that were not on the Christmas deadline list, and to get our 2016 rod building and fly tying classes scheduled. We picked up another Renzetti Traveler Vise during our time abroad and we want to get it turning as soon as possible. So, please join us!
We are expecting to have all our Fuji spinning rod building components delivered by the end of January 2016, which are Fuji’s modern guides and reel seats. We already have a good selection of trout spinning rod blanks available from 6.5 to 7 foot. Andes brand blanks are available in several solid colors like metallic red, green, and copper; and two tone colors copper/ivory, and metallic red/blue.
Like highly praised fly rods, custom spinning rods can also have a decorative reel seat insert to make them more attractive and unique. We’ve used different styles of cork as reel seat inserts in the past but we’re making available two other materials- native Chilean woods and stylized acrylic.
Send us a message, give us a call, or stop in for a closer look at what is new
Fishing Rod Repair
Fishing Rod Repair, Santiago Chile
If you’re searching for fishing rod repair near Santiago you’ve come to the right place. If you don’t find the information you’re looking for in this post then please visit our rod repair page Guide Replacement & General Repairs or contact us at our shop near Park O’Higgins. We will put you on the right track to getting your rod back in action.
We repair and replace all hardware that is built on the original rod blank. This includes butt caps, fighting butts, reel seats, cork handles, winding checks, hook keeps, thread wraps, guides, tip tops, and clear coat finish. Our fishing rod repair pricing depends on the price of the components used and our labor hours to get the repair done. You might be surprised how quick and affordable we can be. We also put the same quality towards repairs as we do all our custom fishing rods.
One thing that we can’t always fix is broken or damaged graphite or fiberglass, like the rods in the photograph above. With rod blank damages we recommend researching the manufacturer of your fishing rod in order to learn the details of their warranty program. What will the total cost be? What is the expected return time? If you would like a second opinion or for us to handle your warranty claim, then contact us or visit us for an estimate. This may even be an opportunity for you to get involved in rod building and learn some basic rod repair.
Did you know that you can remove most tip top guides with the heat from a cigaret lighter? If you break a few centimeters off of your tip during a fishing trip, then try this. Heat the tip top guide with a lighter, take it off of the short broken piece of rod and stick it on the other broke end of your rod- while the guide is still hot. There should be enough adhesive in the tip top guide barrel to secure it for the rest of your fishing trip. If not, then use whatever adhesive you have available. We recommend planning ahead and taking an extra tip guide and a small piece of top adhesive; we can provide that for you.
We hope you don’t have any breaks or rod failures in your angling adventures but if you do please let us help. Thanks!
Our Rod-Building Shop
Welcome to our Rod-Building Shop, Santiago Chile
Our Rod-Building Shop in Santiago Chile will open its doors this November, 2015. Our unique facility and workshop will be located in the center of Santiago, near Park O’Higgins and metro station Rondizzoni. We bring seventeen years of rod making in North America to our little shop. We wish to offer anglers in Chile our finest custom fishing rods made using the best rod blanks and components available.
Besides offering fine finished products our rod-building workshop will provide a comfortable environment for those who wish to build their own rod. We provide instruction and guidance as well as the tools and materials necessary. We take care of the final steps, cleaning and preparing the rod for epoxy, and applying the clear coat finish over the thread wraps. Don’t forget the inscription or custom 360 dpi labels that can further personalize the rod. When the final coat is dry a rod sock and hard tube can be matched to cary away the prized finished product.
We’re happy to invite other “Cañaderos” (my made-up Spanish word for Chilean Rodmakers) of all skill levels to visit us and share rod-building practices over a cup of coffee or tea. We would be happy to assist with rod projects and we would be open to learning new techniques. This is what inspired us to call our shop Rodmakers of Chile. Its the community that we wish to cultivate. Contact us, come in and have a conversation about these special tools which we use to pursue wild fish. We’ve accomplished something if we could inspire you to take an angling adventure.
My name is Michael Munoz, and I’m a rod maker, a philosopher, and a dreamer. I’d like to share my passion for fine custom rods and help you create something special.
Iconos Sociales